Visit Innatefit1.com for exercise wear and equipment!!!

The Blueprint to Strength: 7 Beginner Push-Up Variations for Upper Body Mastery
Master your strength with these 7 beginner push-up variations. Follow this expert guide to improve your form, build muscle definition, and achieve a stronger upper body at home.
SELF-HELPBEGINNERS FITNESS TIPSWORKOUTSPERSONAL DEVELOPMENTCONFIDENCE BUILDINGFITNESS TIPSHYPERTROPHYSTRENGTH TRAINING
Joseph Battle
6/28/20268 min read

Introduction: The Foundation of Strength
Push-ups stand as the undisputed king of bodyweight exercises. They require no equipment, offer immediate feedback on your physical strength, and provide an efficient path toward building a powerful, defined upper body.
If you want a movement that engages your chest, shoulders, triceps, and core simultaneously, you start here. Many people view the standard push-up as a "pass or fail" test, but that is a strategic error. Instead, think of it as a ladder. Every rung on that ladder is an opportunity to build competence and muscle safely.
This guide breaks down essential beginner push-up variations to help you build a solid foundation. You will move through a specific progression, moving from the simplest form to more complex, muscle-sculpting techniques.
By following this systematic approach, you build the stability and force-production capabilities needed to perform a full-body push-up with perfect form. Let’s focus on the mechanics and strategies required to transform your upper body.
Why Push-Ups Are Critical for Upper-Body Development
The push-up is a horizontal pressing movement. It is a fundamental pattern for human movement. When you execute a push-up correctly, you recruit your pectoralis major (chest), deltoids (shoulders), and triceps brachii (back of the arm).
More importantly, the plank position required to hold a push-up turns the movement into a core-stability challenge. You are effectively performing a dynamic plank while pressing your body weight away from the floor.
Push-ups are among the best bodyweight exercises for upper-body definition because they allow precise scaling. Strength development requires progressive overload—the practice of increasing an exercise’s difficulty over time.
Push-ups allow you to adjust the leverage, angles, and tempo to keep your muscles under tension. Whether you are aiming for raw strength or aesthetic tone, this movement provides the stimulus needed for growth without a gym membership or heavy equipment.
Proper Push-Up Form: The Non-Negotiables
Before you attempt any variation, you must master the mechanics. Poor form leads to stalled progress and potential injury, not muscle growth. Think of your body as a straight line from your head to your heels.
This is your “plank” position. If your hips sag toward the floor or pike high into the air, you lose core tension, which isolates the chest and prevents efficient force transfer.
Hand Placement: Place your hands slightly wider than shoulder-width apart. Your fingers should point forward or slightly outward.
Elbow Position: Do not flare your elbows out to 90 degrees, as this places excessive stress on the shoulder joint. Instead, keep your elbows tucked at a 45-degree angle to your torso, creating an “arrow” shape when viewed from above.
Core Engagement: Squeeze your glutes and tighten your abdominals. This prevents your lower back from arching.
The Lowering Phase: Inhale as you descend, keeping your movement controlled.
The Pressing Phase: Exhale as you press the floor away, fully extending your arms without locking your elbows.
Wall Push-Ups: The Starting Line
The wall push-up is the most accessible entry point for beginners starting their push-up progression at home. It removes a significant portion of your body weight from the equation, allowing you to focus purely on form without the strain of gravity holding you down.
How to execute: Stand facing a wall, about an arm’s length away. Place your palms flat against the wall at shoulder height. Step your feet back slightly to create a slight angle. Lower your chest toward the wall by bending your elbows, then push yourself back to the starting position.
Why it works: This variation is perfect for building confidence. It trains your brain to understand the proper elbow angle and torso alignment. As you get stronger, you can increase the difficulty by moving your feet further away from the wall, which shifts more weight onto your arms. This is the primary way for beginners to do push-ups, a drill that sets the stage for floor-based movements.
Incline Push-Ups: Building Structural Integrity
Once you master the wall, transition to the incline push-up. You can use a sturdy countertop, a bench, or the edge of a couch. The higher the surface, the easier the push-up. As you progress, move to lower surfaces, such as a sturdy chair or a low coffee table.
How to execute: Place your hands on your chosen elevated surface, slightly wider than shoulder-width. Extend your legs behind you so your body forms a straight line. Lower your chest until it nearly touches the surface, then press back up.
Why it works: Incline push-ups bridge the gap between wall push-ups and floor push-ups. They mimic the mechanics of a standard push-up but require you to lift a smaller percentage of your body weight compared to a floor-based variation. This allows for higher volume—more reps—which is crucial for building endurance and muscle definition in the early stages of training.
Knee Push-Ups: Creating Floor Familiarity
Many beginners skip to knee push-ups too early, but they serve a specific purpose: getting you on the floor. The key here is not just "resting" on your knees but maintaining a rigid, straight line from your knees to your head.
How to execute: Get into a plank position, but rest on your knees instead of your toes. Ensure your core is tight. Lower your entire body—chest, hips, and knees—toward the floor as one solid unit. Do not let your hips stay up while your chest drops. Press back up while maintaining that straight line.
Why it works: This variation reinforces the importance of the core. If you cannot maintain a straight line on your knees, you are not ready for a full push-up. This exercise builds the specific upper-body strength required to handle your body weight in the horizontal plane.
Negative Push-Ups: The Strength Multiplier
Negative push-ups are an advanced strategy for a beginner. They focus exclusively on the eccentric (lowering) phase of the movement. Your muscles are stronger during the lowering phase than the lifting phase, which is why this technique accelerates strength gains.
How to execute: Start in the top position of a standard push-up (on your toes). Lower your body toward the floor as slowly as possible—aim for a count of 3 to 5 seconds. Once you touch the floor, drop your knees to the ground to reset, then return to the high plank position on your toes.
Why it works: This creates high tension in the muscle fibers, which is essential for upper-body definition. By slowing down the movement, you force your muscles to work harder throughout the entire range of motion, providing a more intense stimulus than standard reps.
Wide Push-Ups: Emphasizing the Chest
Once you are comfortable with the basics, you can alter your hand placement to change the focus. Wide push-ups involve placing your hands significantly wider than shoulder-width.
How to execute: Set your hands wider than standard, keeping the same core tension and straight-line body position. Lower your chest until it is close to the floor, then press back up.
Why it works: Because your hands are wider, the range of motion is slightly reduced, but the emphasis shifts more toward the outer pectoral muscles. This is a great variation for people who want to focus specifically on their chest workout and expand their aesthetic width.
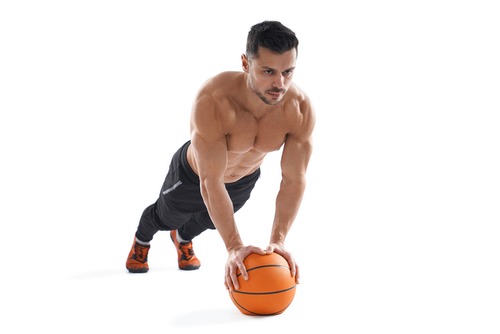
Close-Grip Push-Ups: Targeting the Triceps
If you want to focus on the back of your arms, the close-grip push-up is your go-to move. This variation requires more stabilization and places the majority of the workload on your triceps and inner chest.
How to execute: Place your hands directly under your shoulders or even closer, forming a diamond shape with your thumbs and index fingers if you choose. Keep your elbows tucked very close to your sides as you lower.
Why it works: The close grip changes the lever arm of the exercise, forcing the triceps to do significantly more work. This is highly effective for building the “arm strength” often associated with athletic performance.
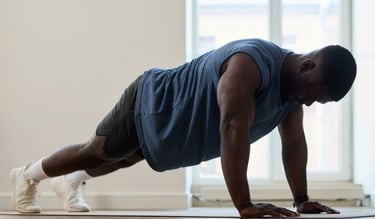
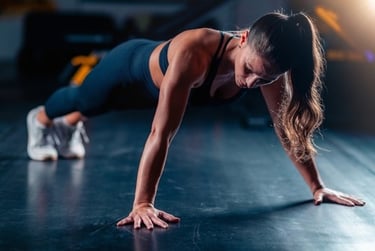
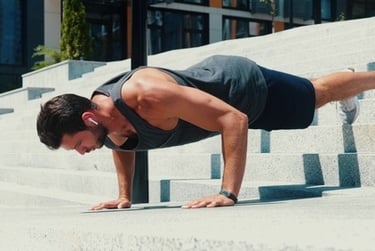
Standard Push-Ups: The Goal
The standard push-up is the ultimate demonstration of upper-body competency. If you have progressed through wall, incline, knee, and negative push-ups, you are ready to perform these with perfect form.
How to execute: Maintain a rigid plank position on your toes. Lower until your chest is an inch from the floor, then push back up to the starting position. Your core must remain engaged throughout.
Why it works: This is the full expression of your training. By using the previous variations, you have prepared your connective tissues, muscles, and nervous system to handle this load safely.
How to Progress: A Strategic Roadmap
You cannot improve if you do not track your training. Use this hierarchy to guide your workouts:
Phase 1: Master Wall Push-Ups (3 sets of 15 reps).
Phase 2: Move to Incline Push-Ups (3 sets of 12 reps).
Phase 3: Introduce Knee Push-Ups (3 sets of 10 reps).
Phase 4: Incorporate Negative Push-Ups (3 sets of 5 reps).
Phase 5: Standard Push-Ups (Start with 1 to 2 reps and build volume).
Training Frequency: For beginners, perform these movements 3 times per week, with a day of rest between sessions. This allows your muscles to repair and grow stronger.
Sample Beginner Push-Up Routine
Perform this simple routine three times a week for maximum results:
Warm-up: Arm circles and light jumping jacks (3 minutes).
Incline Push-Ups: 3 sets of 10 reps.
Negative Push-Ups: 2 sets of 5 reps (emphasize the 5-second count).
Standard Push-Up Attempts: 2 sets to your limit (focusing on form, not quantity).
Cool down: Gentle chest and shoulder stretches.
Common Mistakes to Avoid
Rushing: Moving too fast uses momentum rather than muscle strength. Move slowly.
Hyperextending the neck: Keep your neck neutral. Look at a spot on the floor about a foot in front of you.
Choosing the wrong level: If you cannot keep your form, regress to an easier variation immediately. Quality creates results.
Skipping the warm-up: Your joints and muscles need blood flow to perform effectively.
Frequently Asked Questions (FAQ)
Q: How do I know when to move to the next variation? A: When you can complete 3 sets of 15 reps with perfect form, it is time to move to the next level of difficulty.
Q: Can push-ups replace bench pressing? A: For general fitness and upper body definition, absolutely. They offer similar muscle recruitment patterns without the risk of heavy equipment.
Q: Should I do push-ups every day? A: No. Muscles grow during rest. Aim for 2-4 times per week to ensure recovery.
Conclusion
Building a stronger, more defined upper body does not require fancy equipment or complex movements. It requires discipline to master the basics. By using these beginner push-up variations, you are employing a proven strategy for growth. Start with the wall, stay consistent with your incline reps, and respect the negative push-up. I still use these movements for chest training, especially the knee push-ups, as a finisher for a serious pump.
Your strength is built in the tension you create and the consistency you maintain. Commit to this progression, focus on your form, and you will build the upper body you desire.