Visit Innatefit1.com for exercise wear and equipment!!!

Staggered Training: How to Pack Real Results into a Small Space with Almost No Equipment
Staggered training uses non-competing exercise pairs to reduce workout time and maximize results. This guide explains pairing strategies, the science behind them, and sample routines for minimal-equipment workouts at home. Perfect for busy professionals with small spaces.
SELF-HELPBEGINNERS FITNESS TIPSWORKOUTSFITNESS TIPSSTRENGTH TRAININGEQUIPMENT SUGGESTIONSMOTIVATION
Joseph Battle
5/29/202611 min read
Introduction
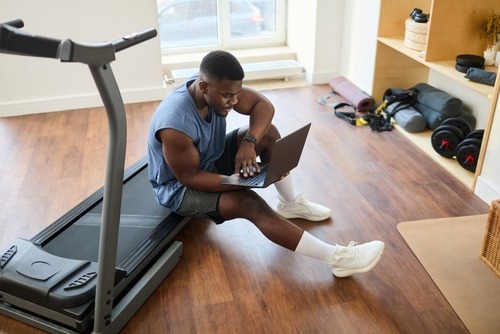
You have a pair of dumbbells, a resistance band that’s seen better days, and maybe enough floor space for a yoga mat. Your schedule? Packed. Your goal? Real, measurable progress. Most workout advice assumes you have a gym full of machines, endless time, and the ability to rest three minutes between sets. That advice doesn’t help when your “gym” is a corner of the living room, and your session has to fit between back-to-back meetings.
Staggered training changes that equation. It is a strategic approach to pairing exercises that keeps your body working continuously while your muscles cycle through brief recovery windows. Instead of doing all your chest work, then resting, then all your leg work, you alternate between non-competing movements.
The result: you finish a full-body workout in the time it normally takes to train just one body part. This article walks you through the science, the pairing strategies, and a complete home workout system you can start using today. By the end, you will know exactly how to pair exercises for efficient home training and build a routine that fits your space, your equipment, and your life.
What Is Staggered Training?
Staggered training is the practice of performing two exercises back-to-back that target different muscle groups or movement patterns. You finish set one of Exercise A, then immediately move to set one of Exercise B. After completing both, you rest your full rest interval and repeat. This is also known as supersetting or compound pairing, but the term “staggered” emphasizes the deliberate offset of fatigue—one muscle works while the other recovers.
Traditional training uses straight sets: do three sets of bench press, rest three minutes, move to shoulder press, repeat. That approach works well in a fully equipped gym where you can sit on a bench and scroll your phone. At home, it wastes time. Your body is ready to work again long before your rest timer beeps, and you are left standing around with your dumbbells gathering dust.
Staggered training solves that downtime problem. It transforms rest periods into productive work windows. While your chest recovers from a press, your legs perform a squat. By the time you return to the press, your chest has cleared metabolic waste and is ready for another intense effort. The result is a workout that feels shorter, keeps your heart rate elevated, and packs more total volume into the same 30 minutes.
This approach is not new. Bodybuilders have used supersets for decades to increase intensity and blood flow. However, staggered training differs in its emphasis on pairing exercises that do not compete for the same energy resources. You are not doing biceps curls after triceps extensions—that would fatigue the same arm muscles and limit performance. Instead, you choose partners that allow each muscle group to fully recover while the other does the heavy lifting.
The Science Behind Why Staggered Training Works
To understand why staggered training is effective, you need to know a little about how your muscles produce energy and what limits your performance between sets.
When you perform a set of an exercise—say, push-ups—your muscles rely on a mix of energy systems. For high-effort, short-duration work, they use the phosphagen system, which fuels explosive movement for about ten to fifteen seconds.
As the set continues, they shift to glycolytic metabolism, which breaks down stored carbohydrates. This process leaves behind byproducts such as lactate and hydrogen ions, which create that familiar burning sensation and signal your muscles to slow down.
Your body clears those byproducts during rest. The phosphagen system is replenished in about two to three minutes. Glycolytic waste takes a bit longer, but significant clearance occurs within 60 to 90 seconds. Here is the key: those byproducts are local. They accumulate in the specific muscles you just used. Your chest feels heavy after push-ups, but your legs feel fresh.
Staggered training exploits this local fatigue. By pairing a pushing exercise with a lower-body movement, you allow the chest to rest while the legs work. The legs generate their own fatigue, but the chest recovers almost as if you were sitting still.
You get the benefit of a full rest interval for each muscle group without any actual downtime. Physiological studies on supersets show that total workout duration can drop by up to 40 percent while maintaining similar strength gains compared to traditional straight sets.
Additionally, staggered training tends to keep your heart rate elevated for a longer portion of the workout. Because you are moving continuously—even if not at high intensity—your cardiovascular system stays engaged. This can improve calorie burn and work capacity over time. The method is not a gimmick. It is a practical application of how muscle recovery works.
Upper Body + Lower Body – The Classic Power Pair
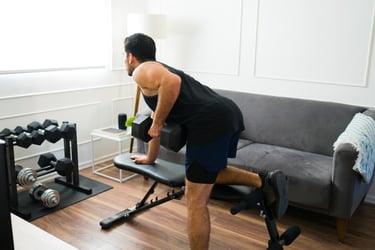
This pairing strategy is the most intuitive and the easiest to implement. You take one upper-body movement and one lower-body movement, alternating them. For instance, perform a set of dumbbell rows, then immediately move into goblet squats. The upper body pulls while the lower body pushes. Neither muscle group interferes with the other’s recovery.
Why this works so well: The upper and lower bodies use separate vascular systems and have distinct energy demands. Your legs contain the largest muscle mass in your body, requiring significant blood flow. When you squat, blood rushes to your quads, hamstrings, and glutes. Meanwhile, your upper body’s local circulation is free to clear metabolites from the previous set. By the time you return to rows, your back muscles feel ready to pull again.
Benefits for the home trainer:
You can train your entire body in one session without spending two hours.
The alternating movement keeps your core activated and your balance challenged.
Equipment is shared efficiently—one pair of dumbbells can serve both exercises.
Examples of upper/lower pairings:
A1: Dumbbell Bench Press (4 sets × 8–10 reps) → 90 seconds rest
B1: Dumbbell Romanian Deadlifts (4 sets × 10–12 reps) → 90 seconds rest
Chest works while hamstrings recover; hamstrings work while chest recovers.A1: Pull-Ups or Banded Rows (3 sets × 6–8 reps) → 60 seconds rest
B1: Bodyweight Step-Ups (3 sets × 8–10 reps per leg) → 60 seconds rest
No equipment crossover issues—rows target back, step-ups target quads and glutes.A1: Overhead Press (3 sets × 6–8 reps) → 90 seconds rest
B1: Squat Variations (Goblet, Front, or Bodyweight) (3 sets × 10–12 reps) → 90 seconds rest
This pairing strategy forms the backbone of any minimal equipment workout. You get a full-body stimulus with just two exercises per circuit. As you progress, you can add a second circuit or increase volume within each pairing.
Push + Pull – Opposing Forces Build Balanced Strength
Staggered training also works beautifully when you pair pushing movements with pulling movements that act on the same region—for example, chest press (push) with dumbbell rows (pull). Both exercises involve the upper body, but they target agonist and antagonist muscle groups. The chest pushes; the back pulls. They oppose each other, and that opposition creates a unique advantage in recovery.
Why this works well: When you perform a pushing exercise, your chest and triceps are the prime movers. Your back muscles act as stabilizers or remain relatively inactive. Immediately switching to a pulling exercise flips the script: your back and biceps become the prime movers, while the chest becomes a stabilizer (or nearly at rest). This reciprocal inhibition allows the chest to recover actively—blood flow continues, but force production drops nearly to zero.
Benefits for the home trainer:
You develop a balanced physique by training opposite muscle groups in close sequence.
The push/pull pairing reduces the risk of muscular imbalances.
It is extremely efficient for home workout systems with limited equipment—one pair of dumbbells can handle both push and pull exercises.
Examples of push/pull pairings:
A1: Dumbbell Floor Press (4 sets × 8 reps) → 60 seconds rest
A2: Single-Arm Dumbbell Row (4 sets × 8 reps per side) → 60 seconds rest Press targets chest and triceps; row targets lats and biceps. No overlap.A1: Resistance Band Chest Press (3 sets × 12–15 reps) → 45 seconds rest
A2: Resistance Band Rows (3 sets × 12–15 reps) → 45 seconds rest
Minimal equipment needed—one band does both exercises.A1: Push-Ups with Feet Elevated (3 sets × failure or 12–15 reps) → 45 seconds rest
A2: Inverted Rows under a Table or Barbell (3 sets × 8–10 reps) → 45 seconds rest
Bodyweight only, zero equipment cost.
This pairing strategy tends to produce a satisfying rhythm. Each set feels different, and you avoid the monotony of doing the same movement repeatedly. For busy professionals, push/pull circuits are the best way to structure home workouts with limited equipment because they hit major muscle groups in half the time.
Strength + Mobility – Pairing Power with Movement Quality
Not all staggered training pairs need to be pure strength exercises. You can combine a heavy, compound movement with a mobility drill that challenges a different part of the body. This approach serves two purposes: it keeps your workout flowing and addresses the flexibility and stability deficits that many home trainers ignore.
Why this works well: Strength exercises create tension and load. Mobility exercises, such as hip openers, thoracic rotations, or ankle drills, involve a range of motion without heavy loading. Placing a mobility drill right after a strength set takes advantage of the fact that your nervous system is already warmed up.
Muscles are pliable, joints are lubricated, and you can move deeper into new ranges safely. Additionally, the mobility exercise serves as active recovery for the muscles you just fatigued.
Benefits for the home trainer:
Your workout becomes more than just lifting—you also build movement quality.
Mobility drills require no equipment and minimal space.
You address common problems like tight hips or stiff shoulders without dedicating a separate session.
Examples of strength/mobility pairings:
A1: Goblet Squats (4 sets × 8–10 reps) → 60 seconds rest
B1: Thoracic Spine Rotation Foam Rolling or Controlled Articular Rotation (4 sets × 5 reps per side) → 30 seconds rest
Squats load the lower body; mobility drill focuses on mid-back and shoulder rotation, areas unrelated to squat fatigue.A1: Deadlifts (Dumbbell or Barbell) (3 sets × 6 reps) → 90 seconds rest
B1: Hip Flexor Stretch with Posterior Tilt (3 sets × 30–40 seconds) → 30 seconds rest
Deadlifts hammer the posterior chain; hip flexor mobility does not interfere and may improve subsequent deadlift form.A1: Overhead Press (4 sets × 8 reps) → 60 seconds rest
B1: Band Pull-Aparts or Shoulder Dislocates (4 sets × 12 reps) → 30 seconds rest
Press fatigues the front delts; band work targets rear delts and scapular control.
This pairing strategy is often overlooked in articles about staggered training, but it is extremely valuable for anyone using a home workout system. You get strength gains and mobility improvements in the same session, which is far more practical than trying to fit separate mobility work into an already crowded week.
Building Your First Staggered Routine
Now that you understand the three primary pairing strategies, it is time to build a complete routine. The following sample workout uses the upper/lower pairing as the foundation and adds a mobility element at the end. It requires only one pair of dumbbells (medium weight) and a resistance band (optional). Total time: approximately 35–40 minutes.
Sample Staggered Workout: Minimal Equipment Full Body
Exercise Sets Reps Rest Between Circuits
A1: Dumbbell Bench Press 4 8–10 90 seconds after completing B1
B1: Goblet Squats 4 10–12 same rest
A2: Bent-Over Row 3 8–10 per side 90 seconds after completing B2
B2: Dumbbell Deadlift 3 10–12 same rest
A3: Overhead Press 3 8–10 60 seconds after completing B3
B3: Static Lunge (alt.) 3 8–10 per leg same rest
C1: Band Pull-Aparts 2 12–15 30 seconds
C2: Hip Flexor Mobilization 2 30–40 seconds per side 30 seconds
Instructions:
Circuits A1/B1, A2/B2, and A3/B3 are staggered pairs. Perform A1, immediately go to B1, then rest 90 seconds. Repeat for all four sets of that pair before moving to the next circuit.
The final pair, C1/C2, uses the strength-and-mobility strategy. Perform C1, then C2, rest 30 seconds, repeat once.
Adjust weights so the last two reps of each set are challenging but not to the point of complete failure.
Progression: Next week, add one extra rep per set. The following week, increase weight by 2–5 pounds. After four weeks, consider adding a fourth circuit or reducing rest by 15 seconds.
Equipment Minimalism & Space Efficiency
One of the biggest advantages of staggered training is how little equipment you actually need. Because you are working different muscle groups in close sequence, each piece of equipment gets used multiple times per circuit. A single pair of dumbbells can be used for bench presses, squats, and rows. A resistance band can shift from chest press to rows to band pull-aparts.
Practical setup tips for small spaces:
Use a sturdy chair or coffee table for step-ups and inverted rows (test stability first).
A yoga mat defines your workout zone and provides cushion for floor exercises.
Resistance bands store easily and can substitute for cable machines in rows and presses.
If you have only one dumbbell, use it for goblet squats, single-arm rows, and overhead press on one side—staggered training adapts.
Why staggered training reduces equipment needs: Traditional circuits often require multiple stations—a bench for chest, a squat rack for legs, a cable machine for rows. At home, you lack those stations. Staggered training lets you set up one or two pieces of equipment and rotate through exercises without rearranging your space. Your home gym becomes as efficient as your workout.
Common Mistakes & How to Avoid Them
Even a well-designed staggered routine can fail if you overlook a few key principles. Here are the most common pitfalls and how to sidestep them.
Mistake 1: Pairing two exercises that both stress the same muscle group. This defeats the purpose of staggered training. If you pair push-ups with triceps dips, your triceps never recover. The result is a sharp drop in performance on the second exercise. Solution: Use the “non-competing” rule. If the second exercise requires the same prime movers as the first, find a different partner.
Mistake 2: Taking too long between the two exercises. Staggered training works because the interval between the two exercises is short. If you take more than 20–30 seconds to set up for the second exercise, you lose the active-recovery benefit. Solution: Keep your equipment ready. Arrange dumbbells, bands, or markers so you can transition in seconds. Practice the sequence before your first working set.
Mistake 3: Using too much weight. When you alternate exercises, central nervous system fatigue accumulates faster than with straight sets. You may need to drop your working weight by 5–10 percent from your usual weight. Solution: Start lighter than you think. Focus on perfect form and smooth transitions. After two weeks, test whether you can increase the load.
Mistake 4: Neglecting the mobility/stability pair. Many home trainers focus only on strength pairings and ignore mobility. Over time, that approach leads to stiffness and compensations. Solution: Include one mobility or stability exercise per session, even if it is just a short stretch after a compound lift. This keeps your movement quality high and your joints healthy.
Progression & Tracking Progress
Staggered training provides a clear path for progression. Because you are working with minimal rest between exercises, improvements come from three sources: increasing load, increasing reps, or decreasing rest. Tracking each workout helps you decide which lever to pull.
How to scale difficulty:
Load: Add weight in small increments (2–5 pounds) every two weeks.
Reps: Increase target reps by one per set each week until you reach the upper end of the range, then add weight.
Rest: Reduce rest between circuits by 15 seconds every three weeks, down to a minimum of 45 seconds.
Volume: Add a fourth circuit to your workout or increase the number of sets per exercise.
Tracking methods:
Keep a simple log: date, exercise, weight, reps, rest period. Note how challenging each circuit felt on a scale of 1–10.
Pay attention to recovery cues. If your performance on the second exercise drops more than 20 percent week over week, you need more rest or lighter weight.
Use subjective feedback: Do you feel less sore after sessions? Are you able to complete the workout faster? These are signs of adaptation.
When to progress: Stay with a given load and rep scheme for two to four weeks. If you consistently hit the top end of the rep range with good form and minimal struggle, it is time to increase the challenge.
Conclusion & Action Steps
Staggered training is not a trendy gimmick. It is a practical, science-backed method that turns your limited home gym into an efficient training machine. By pairing non-competing exercises, you slash your workout time, keep your body engaged, and build strength and mobility simultaneously. Whether you have a full set of dumbbells or just a resistance band and your bodyweight, you can apply these pairing strategies today.
Here are your action steps:
Pick one pairing strategy from the three described (upper/lower, push/pull, or strength/mobility) and design a single circuit. Use the sample workout as a template.
Test it for two weeks. Perform the circuit three times per week, recording your weights and reps each session. Adjust the load as needed.
Add a second circuit after you feel confident with the first. Combine two pairing strategies in one workout—for example, an upper/lower circuit followed by a push/pull circuit.
Incorporate a mobility pair at least once per week. Your joints will thank you.
Review your progress every month. If your numbers are climbing, keep going. If they stall, reduce rest or increase volume.
Staggered training gives you the best way to structure home workouts with limited equipment. Now you have the blueprint. Put it into practice.