Visit Innatefit1.com for exercise wear and equipment!!!

Ignite Your Core: The Ultimate Push-Up System for Rock-Solid Abs and a Sculpted Physique
Unleash the power of push-ups to sculpt a rock-solid core and a defined physique. Discover effective push-up moves, a two-week workout plan, and expert tips to transform your midsection and upper body.
SELF-HELPWORKOUTSCONFIDENCE BUILDINGFITNESS TIPSSTRENGTH TRAININGHEALTH
Joseph Battle
7/5/202512 min read


Unveiling Your Powerhouse: The Core-Centric Push-Up Revolution
Embarking on a fitness journey often brings us back to the foundational strength that defines true physical prowess: a robust core. While many associate push-ups primarily with developing a powerful chest and strong triceps, this versatile exercise offers an unparalleled opportunity for a targeted core workout.
Done correctly and with strategic variations, push-ups become incredibly effective moves to sculpt and tone your midsection, transforming it from merely functional to strikingly defined. This post will explore how these powerful upper-body workouts can transform your physique, showing you how to achieve a tight and toned midsection through dynamic, core-strengthening push-up progressions.
Furthermore, a truly effective workout routine thrives on variety and consistent challenges. Sticking to the same few exercises can lead to plateaus, where your body adapts and progress stalls. By introducing diverse push-up variations, you continually stimulate different muscle groups within your core and upper body, forcing them to adapt, grow, and strengthen.
This not only prevents boredom but also ensures comprehensive muscular development, leading to a more balanced and aesthetically pleasing physique. Embrace the evolution of your routine to unlock new levels of strength and definition.
Prime Your Powerhouse: The Essential Warm-Up Sequence
Before you unleash the full potential of your muscles, a proper warm-up is non-negotiable. It serves as a vital bridge between rest and intense activity, preparing your cardiovascular system, warming your muscles, and increasing blood flow.
Skipping this crucial phase elevates the risk of injury, reduces your performance, and makes your workout feel significantly harder than it needs to be. Think of it as tuning an instrument before a performance; a well-prepared body performs optimally and recovers more efficiently.
To effectively prepare for a core-burning push-up circuit, incorporate dynamic stretches and exercises that mimic the movements you will be performing. Begin with light cardio, like marching in place or jumping jacks, for 2-3 minutes to elevate your heart rate. Follow this with arm circles (forward and backward), torso twists to engage your obliques, and cat-cow stretches to mobilize your spine.
Perform a few light knee push-ups or incline push-ups against a wall to activate the prime movers without fatigue. These movements actively warm up your shoulders, chest, triceps, and, critically, your core, ensuring they are pliable and ready for the intensive work ahead.
The Gauntlet: Designing Your Ultimate Push-Up Circuit
A circuit-style workout is an incredibly efficient and effective method for building strength and endurance simultaneously. By transitioning from one exercise to the next with minimal rest, you maintain a high heart rate, which boosts calorie expenditure and muscular endurance.
For our core-focused push-up routine, a circuit allows us to hit the core from multiple angles using various push-up modifications, ensuring comprehensive development and maximizing the core-strengthening benefits of each move. This approach ensures your muscles remain engaged and challenged throughout the entire sequence, leading to faster progress toward a sculpted physique.
We have curated a series of push-up variations, each designed to specifically target different facets of your core workout while also building impressive upper body strength. For each exercise, we will provide step-by-step instructions to ensure proper form, maximize effectiveness, and prevent injury.
Focus intently on the mind-muscle connection, actively engaging your core throughout every repetition. Remember, quality always prevails over quantity, especially when striving for a tight and toned midsection. By understanding the unique benefits of each move, you can consciously direct your efforts where they count most.
The Ascent: Mountain Climber Push-Up
The Mountain Climber Push-Up is a dynamic powerhouse that brilliantly combines cardiovascular challenge with comprehensive strength training, transforming a traditional push-up into a full-body workout. This hybrid movement demands significant core stability as you rapidly alternate knee drives towards your chest, simultaneously engaging your shoulders, chest, triceps, and most notably, the entire abdominal wall.
It's an excellent way to elevate your heart rate while simultaneously sculpting and toning your midsection, making it one of the most effective push-up moves for achieving a truly dynamic physique.
Step-by-step instructions:
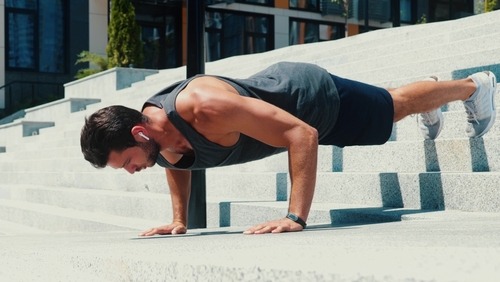
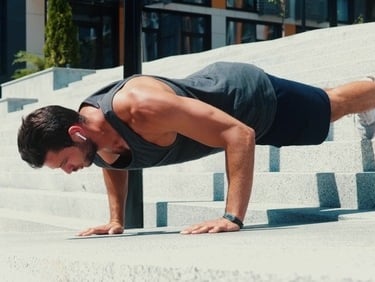
Starting Position: Begin in a high plank position, hands directly under your shoulders, fingers pointing forward, and your body forming a straight line from head to heels. Engage your core tightly.
The Push-Up: Perform one standard push-up, lowering your chest towards the floor by bending your elbows, then pushing back up to the starting plank position. Maintain core engagement throughout.
Mountain Climbers: Immediately after completing the push-up, bring your right knee towards your chest, then quickly return it to the starting position. Without pause, bring your left knee towards your chest, then return it. Perform 2-4 knee drives per leg, depending on your fitness level.
Repeat: Seamlessly transition back into another push-up, followed by the mountain climber sequence. Modifications:
Beginners: Perform the push-up on your knees or against an incline (e.g., a sturdy bench or wall). You can also slow down the mountain climber's pace or reduce the number of knee drives to make the exercise more manageable. Focus on mastering the push-up form first before adding the dynamic leg movement.
Advanced: Increase the speed of the mountain climbers or add a plyometric element by performing a clap push-up before the mountain climber sequence. You can also elevate your feet on a stable surface to increase the challenge during the push-up portion.
The Precision Point: Diamond Push-Up
The Diamond Push-Up is an exceptionally effective variation renowned for its ability to intensely target the triceps and inner chest muscles, providing a level of isolation that few other push-ups can match.
By bringing your hands close together to form a diamond shape with your thumbs and index fingers, you significantly increase the demand on the triceps, the primary muscles responsible for extending your elbow.
Simultaneously, this narrower grip puts greater emphasis on the sternal (inner) fibers of your pectoralis major, contributing to that coveted "separation" and definition in the center of your chest. This move is crucial for truly sculpted arms and a well-defined chest, integral parts of comprehensive upper-body workouts.
Step-by-step instructions:
Hand Placement: Begin in a high plank position, but bring your hands together directly under your chest. Position your thumbs and index fingers so they touch, forming a diamond or triangle shape. Your fingers should splay out to the sides.
Body Alignment: Ensure your body forms a straight line from your head to your heels, with your core tightly engaged. Avoid sagging hips or an arched lower back.
Descent: Inhale as you slowly lower your chest towards the diamond formed by your hands. Keep your elbows tucked in close to your body rather than flaring out. Focus on feeling the stretch in your triceps and inner chest.
Ascent: Exhale powerfully as you push through your hands, driving back up to the starting position. Fully extend your arms without locking your elbows. Maintain strict core control throughout the movement to prevent any rocking or instability. Tips for proper form:
Elbow Position: Crucially, keep your elbows close to your sides throughout the entire range of motion. Allowing them to flare out reduces the triceps engagement and can place undue stress on your shoulder joints.
Core Engagement: Actively brace your core as if preparing for a punch. This prevents your hips from sagging and maintains the straight plank position, ensuring your core remains engaged as a stabilizer.
Controlled Movement: Avoid rushing. A slow, controlled descent and a powerful, controlled ascent will maximize muscle activation and minimize the risk of injury. Modifications:
Beginners: Perform Diamond Push-Ups on your knees. This reduces the load on your upper body while still allowing you to learn the specific hand placement and feel the engagement of your triceps. Alternatively, perform them against an incline, such as a sturdy bench or wall.
Advanced: To increase the challenge, elevate your feet on a stable surface (e.g., a plyo box or step). This increases the percentage of your body weight you are lifting, intensifying the work for your triceps and inner chest. Another advanced variation is to add a slight pause at the bottom of the movement.
The Apex Ascent: Decline Push-Up
The Decline Push-Up is a formidable variation that significantly amplifies the challenge of a standard push-up, expertly targeting the often underdeveloped upper chest and anterior deltoids (the front of the shoulders).
By elevating your feet above your hands, you shift more of your body weight onto your upper body, demanding greater strength from these specific muscle groups. This not only builds impressive upper body mass and definition but also creates an increased demand on your core strengthening capabilities to maintain a rigid, straight body line against the force of gravity.
It is an indispensable move in any comprehensive upper body workout regimen aiming for a truly sculpted physique.
Step-by-step instructions:
Setup: Find a stable, elevated surface such as a sturdy bench, plyo box, or even a low chair. Lie prone on the floor and place your feet on the elevated surface, ensuring your legs are straight and together.
Hand Placement: Position your hands on the floor slightly wider than shoulder-width apart, directly under your shoulders. Your fingers should point forward.
Body Alignment: Extend your arms fully and lift your body into a straight line from your head to your heels, forming an inverted plank. Engage your glutes and, crucially, brace your core tightly to prevent your hips from sagging or arching. This strong core engagement is paramount for safety and effectiveness.
Descent: Inhale as you slowly lower your chest towards the floor by bending your elbows. Keep your elbows at about a 45-degree angle to your body, not flaring out to the sides. Maintain control throughout the movement.
Ascent: Exhale powerfully as you push through your hands, extending your arms to return to the starting elevated plank position. Focus on squeezing your upper chest and shoulders at the top. Safety precautions:
Stable Surface: Always use a stable and non-slip elevated surface. A wobbly surface can lead to loss of balance and injury.
Controlled Movement: Avoid dropping down rapidly. Control both the eccentric (lowering) and concentric (lifting) phases of the movement to prevent injury and maximize muscle engagement.
Neck Alignment: Keep your neck in a neutral position, in line with your spine. Avoid craning your neck up or letting it hang down.
Listen to Your Body: If you experience sharp pain in your shoulders or wrists, stop the exercise immediately. You might need to reduce the height of the elevation or regress to an easier variation. Modifications:
Beginners: Start with a lower elevation for your feet. Even a few inches can increase the challenge. You can also perform incline push-ups (with hands elevated on a bench) as a precursor to decline push-ups, gradually building strength in the upper chest and shoulders.
Advanced: Increase the height of the elevated surface for your feet, which further shifts the body weight onto your upper body. Alternatively, perform plyometric decline push-ups, where you explosively push off the floor, briefly lifting your hands before landing softly. Another option is to add a weighted vest for additional resistance.
The Dynamic Duo: Plank Jack Push-Up
The Plank Jack Push-Up is a highly dynamic and challenging movement that ingeniously combines the core-stabilizing benefits of a plank with the explosive cardio of a plank jack, all while integrating the foundational strength of a push-up.
This multifaceted exercise targets your entire core musculature, including your rectus abdominis, obliques, and transverse abdominis, by forcing them to stabilize your body against the lateral movement of your legs.
Simultaneously, the push-up portion engages your chest, shoulders, and triceps. This makes it an incredibly effective push-up move to sculpt and tone your midsection while also improving your cardiovascular fitness, coordination, and overall muscular endurance. It's genuinely one of the most comprehensive core-strengthening exercises you can incorporate.
Step-by-step instructions:
Starting Position: Begin in a high plank position. Ensure your hands are directly under your shoulders, fingers pointing forward, and your body forms a perfectly straight line from the crown of your head to your heels. Your core must be tightly engaged.
The Push-Up: Perform one complete standard push-up, lowering your chest towards the floor by bending your elbows, then pushing powerfully back up to the starting high plank. Maintain your rigid plank posture throughout.
The Plank Jack: Immediately after completing the push-up, keeping your core rigid and your hips stable, explosively jump both feet out to the sides, wider than shoulder-width, similar to a jumping jack motion.
Return to Plank: Without pausing, quickly jump your feet back together to the starting high plank position.
Repeat: Seamlessly transition back into another push-up, followed by the plank jack sequence. Maintain a fluid, controlled rhythm. Tips for proper form:
Core Control is Key: The most crucial aspect of this exercise is maintaining a stable, neutral spine throughout the entire movement, especially during the plank jack. Avoid letting your hips sag or pike up when you jump your feet out and in. Your core should be braced like a steel beam.
Controlled Landing: When jumping your feet back in, land softly on the balls of your feet. Avoid slamming your feet down, which can create unnecessary impact on your joints and disrupt your form.
Breathing: Exhale forcefully as you push up and as you jump your feet out. Inhale as you lower during the push-up and as you bring your feet back in.
Rhythm: Aim for a smooth, continuous flow between the push-up and the plank jack. The more fluid your movement, the more effectively you will challenge your cardiovascular system and core stability. Modifications:
Beginners: If the whole movement is too challenging, you can break it down. Perform a standard push-up (or an incline/knee push-up), then rest briefly. Then, from a high plank, perform the plank jacks by stepping one foot out at a time rather than jumping both simultaneously. This reduces the impact and the demand for explosive core stability.
Intermediate: Reduce the number of push-ups or plank jacks per set if you find yourself losing form. Focus on mastering the smooth transition and maintaining core control before increasing the number of reps.
Advanced: To further increase the intensity, you can perform a plyometric push-up (also known as a clapping push-up) before the plank jack. Alternatively, speed up the tempo of the plank jacks while maintaining perfect form, or incorporate a burpee element by jumping your feet towards your hands after the plank jack, then jumping up.
The Wind Down: Your Essential Cool-Down
Just as vital as the warm-up, the cool-down phase is crucial for optimizing recovery and preventing post-workout stiffness. After an intense core-burning push-up workout, your muscles are warm, pliable, and in need of gentle lengthening.
A proper cool-down helps to bring your heart rate back to resting levels gradually, promotes blood flow to aid in nutrient delivery and waste product removal, and, most importantly, allows your muscles to return to their optimal length, thereby preventing tightness and improving flexibility. This proactive approach significantly reduces delayed onset muscle soreness (DOMS) and prepares your body for your next training session.
Incorporate static stretches that target the primary muscle groups worked during your push-up circuit. Hold each stretch for 20-30 seconds, breathing deeply and relaxing into the stretch without bouncing.
Focus on stretching your chest (e.g., doorway chest stretch), triceps (e.g., overhead triceps stretch), shoulders (e.g., cross-body arm stretch), and, importantly, your core and back (e.g., child's pose cobra stretch).
Finish with a gentle spinal twist to release any tension in your torso. This systematic cool-down aids in muscle recovery enhances your range of motion and significantly contributes to your long-term athletic health and performance.
The Two-Week Core Ignition Plan: Sample Workout
This sample workout is designed to gradually build your strength and endurance over a period of two weeks. Perform this circuit 2-3 times per week, with at least one day of rest in between. Focus on maintaining impeccable form rather than rushing through reps.
Week 1: Building the Foundation Perform 2-3 rounds of the circuit, resting 60-90 seconds between rounds.
Mountain Climber Push-Up: 6-8 reps (1 push-up + 2-4 mountain climbers per side = 1 rep)
Focus: Control and stability through the core.
Diamond Push-Up: 8-10 reps (use knees if needed)
Focus: Squeezing the triceps and inner chest.
Decline Push-Up (low elevation): 6-8 reps (use a very low step if full decline is too hard)
Focus: Upper chest and shoulder engagement.
Plank Jack Push-Up: 6-8 reps (1 push-up + 1 plank jack = 1 rep, step out legs if needed)
Focus: Maintaining a rigid plank during the jack.
Week 2: Increasing the Intensity Perform 3-4 rounds of the circuit, resting 45-60 seconds between rounds. Aim to increase reps or make slight modifications to increase difficulty.
Mountain Climber Push-Up: 8-10 reps (try one push-up + 4-6 mountain climbers per side = 1 rep)
Progression: Speed up mountain climbers slightly and maintain core bracing.
Diamond Push-Up: 10-12 reps (try to transition off knees for more reps if possible)
Progression: Increase range of motion, pause briefly at the bottom.
Decline Push-Up (medium elevation): 8-10 reps (increase elevation slightly if comfortable)
Progression: Slower eccentric (lowering) phase.
Plank Jack Push-Up: 8-10 reps (1 push-up + 1 plank jack = 1 rep; try to jump both legs if stepping previously)
Progression: Increase speed of plank jacks, maintain strict core control.
Remember to perform a warm-up before and a cool-down after each workout session.
Your Sculpted Horizon: Consistency, Progression, and Beyond
You have now journeyed through the intricacies of a truly core-burning push-up workout, exploring how strategic variations can help you achieve a sculpted and defined physique. We’ve covered the crucial role of warm-ups and cool-downs, studied the mechanics and benefits of specialized push-up variations, and provided a practical two-week sample workout to help kickstart your transformation.
The journey to a tight and toned midsection and impressive upper body strength is not about a single strenuous session but rather the consistent application of effort and intelligent progression. Every push-up, every repetition, and every workout contributes to building the body you desire.
Consistency is your unwavering ally. Showing up, even on days when motivation wanes, builds momentum and compounds results over time. Progression, meanwhile, is the key to continuously challenging your muscles, forcing them to adapt and grow stronger.
As you master these effective push-up moves to sculpt and tone your midsection, look for ways to increase the challenge: add more repetitions, reduce rest times, elevate your feet higher, or experiment with even more advanced plyometric variations. Embrace the journey of pushing your limits and celebrating every milestone you achieve.
Incorporate these diverse and dynamic push-ups into your regular workout routine, and witness your core transform into the powerhouse you always knew it could be, leading to a truly formidable and sculpted physique. Your strength, your definition, and your confidence will undoubtedly soar.